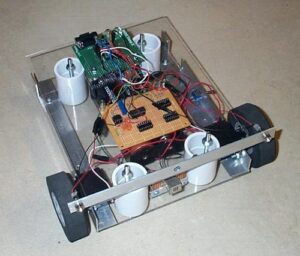
Goto Robot Brains
These are my “Go To” robot brains or robot “compute”. Below you’ll see an Arduino Leonardo ~$25, an ESP 8266 (NodeMCU) ~$8, and a Raspberry Pi 3 ~$45. I’ve included links to purchase below along with their specs as well as the specs of other similar items.
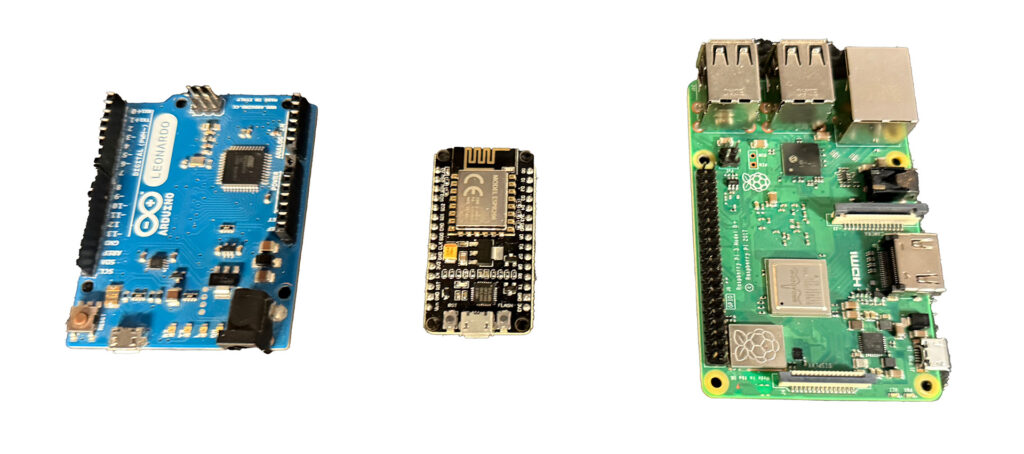
So why these items? Well the Leonardo has a friendlier USB connector, a Micro USB, and more digital, PWM and Analog inputs compared to the Uno. The ESP 8266 isn’t as powerful as the ESP 32, but the compile time is faster and I mostly work with WiFi vs. Bluetooth. The Raspberry Pi 3, also isn’t as powerful as the Pi 4 or Pi 5, but it also takes the Micro USB cable and the camera connector is more compatible with older less “Pure” cameras. Also because I do most of my work via API / Wi-Fi, it’s perfect for being a connector to all things on the Robot to the network.
Here’s a summary of all the stuff I’ve purchased over the years with some specs.
| Device | Connector | Input Power Voltage | Memory | Speed | MIPS | Inputs | Notes |
|---|---|---|---|---|---|---|---|
| Arduino Uno | USB-B | 7-12V DC (via barrel jack) / 5V USB | 32K Flash, 2K SRAM | 16 MHz | 16 MIPS | 14 Digital I/O (6 PWM), 6 Analog inputs, 1 Serial (UART) | Arduino Compiled |
| Arduino Leonardo | MicroUSB | 7-12V DC (via barrel jack) / 5V USB | 32K Flash, 2.5K SRAM | 16 MHz | 16 MIPS | 20 Digital I/O (7 PWM), 12 Analog inputs, 1 Serial (UART), 1 USB | Arduino Compiled |
| Arduino Mega256 | USB-B | 7-12V DC (via barrel jack) / 5V USB | 256K Flash, 8K SRAM | 16 MHz | 16 MIPS | 54 Digital I/O (15 PWM), 16 Analog inputs, 4 Serial (UART) | Arduino Compiled |
| ESP8266 | MicroUSB | 3.0V – 3.6V | 4MB Flash, 80K SRAM | 80-160 MHz | 80-160 MIPS | 17 GPIO (up to 9 usable), 1 WiFi, 1 Serial (UART) | Arduino Compiled, WiFi |
| ESP32 | MicroUSB | 3.0V – 3.6V | 4MB Flash, 520K SRAM | 240 MHz | 600 MIPS | 36 GPIO, 16 PWM, 2 WiFi, 2 Bluetooth, 3 Serial (UART) | Arduino Compiled, Bluetooth, Wi-Fi, Dual Core |
| ESP32-CAM | MicroUSB | 3.0V – 3.6V | 4MB Flash, 520K SRAM | 240 MHz | 600 MIPS | 11 GPIO, 1 Camera, 1 WiFi, 2 Bluetooth, 3 Serial (UART) | Arduino Compiled, Bluetooth, Wi-Fi, Dual Core w/ Camera |
| Raspberry Pi Zero | MicroUSB | 5V | 512 MB RAM | 1 GHz | 2000 MIPS | 40 GPIO, 1 Camera Serial Interface (CSI), 1 Serial (UART), 1 I2C, 1 SPI | Full OS |
| Raspberry Pi Zero W | MicroUSB | 5V | 512 MB RAM | 1 GHz | 2000 MIPS | 40 GPIO, 1 Camera Serial Interface (CSI), 1 WiFi, 1 Bluetooth, 1 Serial (UART), 1 I2C, 1 SPI | Full OS, Wireless |
| Raspberry Pi Zero 2 | MicroUSB | 5V | 512 MB RAM | 1 GHz | 4000 MIPS | 40 GPIO, 1 Camera Serial Interface (CSI), 1 WiFi, 1 Bluetooth, 1 Serial (UART), 1 I2C, 1 SPI | Full OS, Wireless, Quad Core |
| Raspberry Pi | MicroUSB | 5V | 256-512 MB RAM | 700 MHz | 1000 MIPS | 26 GPIO, 1 Camera Serial Interface (CSI), 1 Serial (UART), 1 I2C, 1 SPI | Full OS |
| Raspberry Pi B | MicroUSB | 5V | 512 MB RAM | 700 MHz | 1000 MIPS | 26 GPIO, 1 Camera Serial Interface (CSI), 1 Serial (UART), 1 I2C, 1 SPI | Full OS |
| Raspberry Pi 2 | MicroUSB | 5V | 1 GB RAM | 900 MHz | 3600 MIPS | 40 GPIO, 1 Camera Serial Interface (CSI), 1 Serial (UART), 1 I2C, 1 SPI | Full OS, Quad Core |
| Raspberry Pi 3 | MicroUSB | 5V | 1 GB RAM | 1.2 GHz | 4800 MIPS | 40 GPIO, 1 Camera Serial Interface (CSI), 1 WiFi, 1 Bluetooth, 1 Serial (UART), 1 I2C, 1 SPI | Full OS, Bluetooth, WiFi, Quad Core |
| Raspberry Pi 4 | USB-C | 5V | 1, 2, 4, 8 GB RAM | 1.5 GHz | 6000 MIPS | 40 GPIO, 1 Camera Serial Interface (CSI), 1 WiFi, 1 Bluetooth, 1 Serial (UART), 2 I2C, 1 SPI | Full OS, Bluetooth, WiFi, Quad Core |
| Raspberry Pi 5 | USB-C | 5V | 1, 2, 4, 8 GB RAM | 2.4 GHz | 9600 MIPS | 40 GPIO, 2 Camera Serial Interfaces (CSI), 1 WiFi, 1 Bluetooth, 1 Serial (UART), 2 I2C, 1 SPI | Full OS, Bluetooth, WiFi, Quad Core |